Making things out of wood
Continuing my project to build an e-ink photo frame calendar, my next step was to build the frame. This was comprised of two disasters and a compromise. I’m not very good at wood.
Disaster 1: DIY
I learnt how frame mouldings work and found a local art shop that would sell me a length. I built it in SketchUp and measured the model so I could be confident about the measurements. I then bought myself a mitre box so I could cut some beautiful 45° angles.
I have always struggled to saw straight but I thought the mitre box would be the solution to this. Surely it’s impossible to do anything but saw straight with a mitre box? It turns out, if you’re really bad at sawing things, it’s possible to saw through a mitre box. Once I had sawed new directions into all four 45° slots, I decided to power through and sand away the mistakes.
This almost worked. I had to do a lot of sanding but I eventually got the four pieces to fit together and look okay from the front. Unfortunately, I had done so much sanding that I lost a good few centimetres of screen aperture. This frame went into the box of offcuts so I could forget it existed.
Disaster 2: Communication breakdown
I went back to the art shop asked the same framer to build me a frame. I think he knew.
I was using the box frame moulding backwards; with the foot of the ‘L’ shape facing the viewer to cover the circuitry and outside-edge of the screen. Box frames are designed to be used the other way, so the item sits nicely in the frame. I forgot about that and when I asked for an aperture to fit the 7.4” screen, what I had unintentionally ordered was a box frame that the screen would sit in. When I went to collect the frame, the aperture was 4 inches long and 1.5 inches wide:
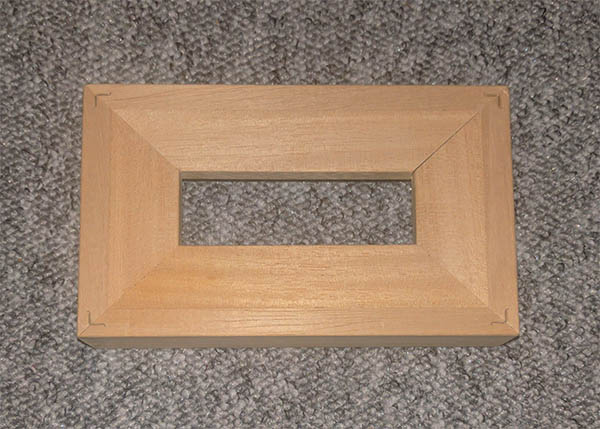
It’s okay to laugh.
I’m not particularly brave in these situations so I told him it was perfect, paid, and put it in the box with the other frame.
Compromise: 90° angles are less horrible
With talking to people and cutting angles abandoned, I decided to compromise and make it with straight cuts. I bought a better saw and set to work redesigning:
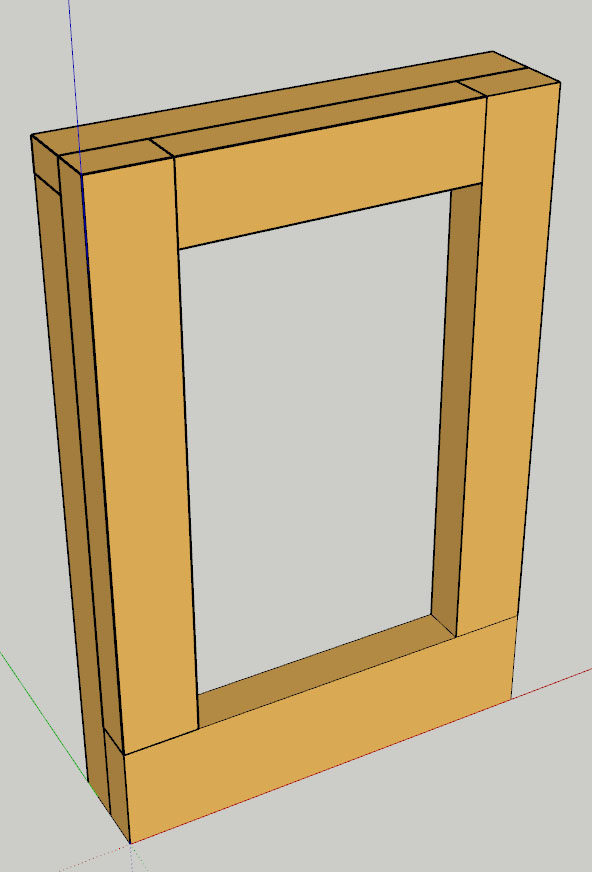
The left, top and right segments are 25mm wide while the bottom segment is 36mm wide. I prefer it looking slightly bottom-heavy and it will allow me to install a button if I ever want to make it more interactive.
To give some cover to the components, and to simulate the ‘L’ shape of the moulding I was trying to use, I attached more pieces to the back. These overlapped the joins on the front for (perhaps!) a bit more strength. I used some wood glue and clamps to get the front together.
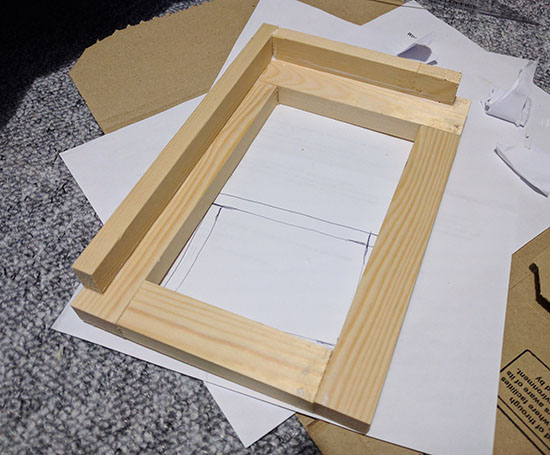
The back was just glued up and pressed for a bit, the entire thing is lovely and strong. I might not trust it hanging on a wall, but with it sitting on my desk, I don’t think I’m going to have a problem.
Next up, attaching bits.