Planning the e-ink photo frame
I am not terribly organised and frequently discover I’m supposed to be in a meeting when either my phone starts beeping and flashing or - if I’ve left that somewhere - a friendly soul PMs me to ask where I am. I wanted to build an actual thing and thought I’d try and solve this problem at the same time.
I quickly thought of building something with a screen that can sit on my desk and display upcoming events. I had a Raspberry Pi sitting about and was confident I could figure out the code, I just needed a screen and something to hold it all together.
There are plenty of LCD screens available that would integrate easily with the Pi. There are even touch screens. My desk already holds two gargantuan monitors and I feared another backlit screen might make my eyes upset.
I settled on using e-ink: I don’t need back-lighting or colour, and I only want to display static content. If I could build this well, I could have something that didn’t look like a device at all.
The proper e-ink developer kits start around $1000. I looked into jail-breaking my Kindle and easing it out of the casing but my device is the Alcatraz of Kindles and its generation has yet to be broken out. I briefly fell in love with the giant Kindle DX, with a 9.7” display, but these were expensive to acquire and I’d probably have felt bad tearing it apart.
I eventually stumbled upon a company called Pervasive Displays, they were mentioned in a forum post about a tiny screen someone had included in a project. After further digging, I found a 7.4” 1-bit screen that I could get hold of for about $150.
Once it completed its journey from the US, I encountered my first problem almost immediately. I had to connect the screen to the driver board, with a thin ribbon cable, into a connector I had never seen before. After jabbing at it for nearly a whole afternoon, I discovered it was hinged and clamped the cable in place.
It would have been possible to communicate directly with the screen but I feared that may have been a leap too far for me, instead, I purchased an additional board (the USB2TCM Interface) which allows the screen to mount as a USB drive. In this case, a single file, in its strange proprietary format (we’ll get into that later), would be sent to the screen. I tested this with an octocat:
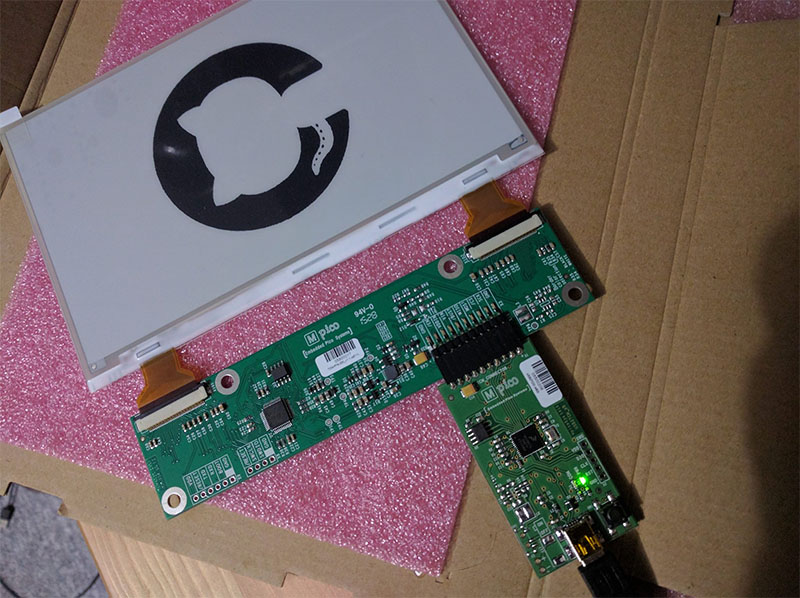
It looked great! The screen is only 1-bit. This means black or white, no shades of grey like you see on a Kindle; the edges of the circle are quite jagged - anti-aliasing isn’t a possibility. When I come to write the software for this, I’ll need to use fonts that work well in this colour depth.
I decided that the ideal way to display this would be in a picture frame. I phoned around some local art shops and found one that sells lengths of moulding, after buying a piece and measuring it, I started creating the frame in Sketch Up:
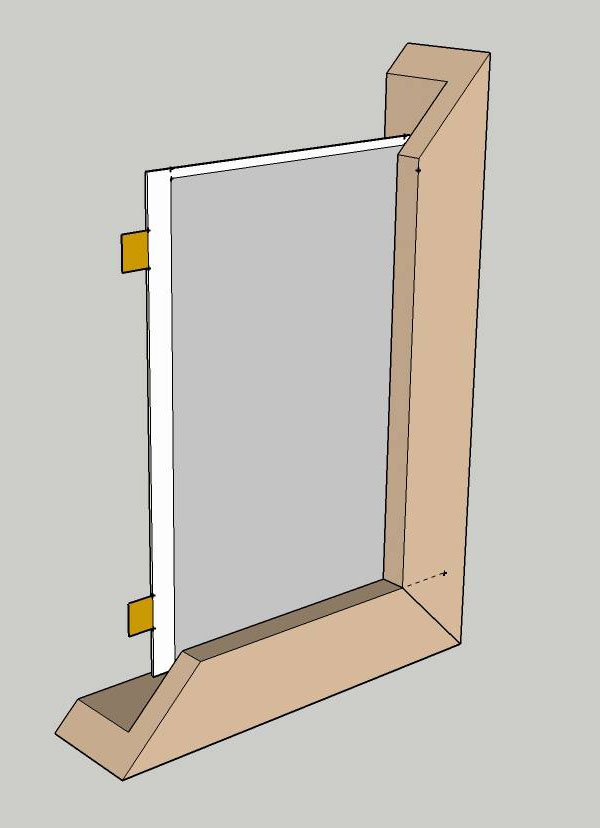
In the next post, I’ll talk about how that went.