Experience and re-printing
I’ve had the frame on my desk for a few months now and I’m delighted that it’s actually useful. I refer to it all the time. I’m embarrassingly proud that I made a thing that actually works. I make it to most meetings on time now!
I had some early issues with timezones (leading to me gatecrashing several meetings) due to Google’s .ics file being difficult to interpret. If my manager in Greece invited me to a meeting, the calendar event would be set for his timezone. I had made an attempt at converting these myself but timezones are hard and daylight savings set it all on fire. To get around this, and improve support for repeating and cancelled events, I switched to using Google’s API. Getting OAuth up and running took a little while but after that it was easy to replace the function that pulled from the .ics address with one that used their API. Now Google handles all those horrible timezones and recurring events.
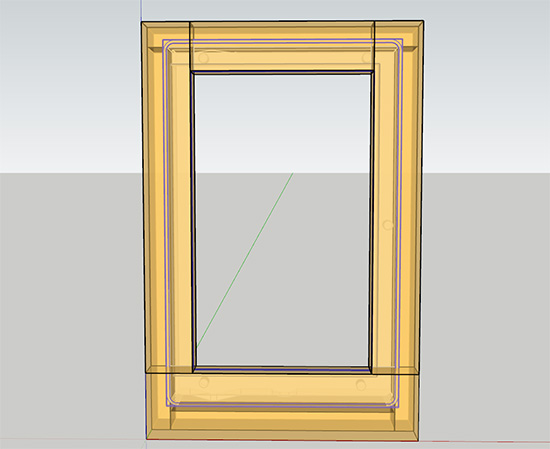
There were also some issues with the frame’s design that I kept wanting to address. I was unhappy with how deep the bezel was, it’s 15mm and that creates a lot of shadow on a screen that is already hard to see in low light. It’s also spectacularly ugly.
I enjoyed 3D printing the board to hold all the circuitry and in the process had measured all the parts reasonably accurately. I decided to 3D print a new frame. I used SketchUp again and eventually discovered how to make a rounded box.
It’s considerably more svelte than the wooden design. Here’s the two overlayed and made transparent:
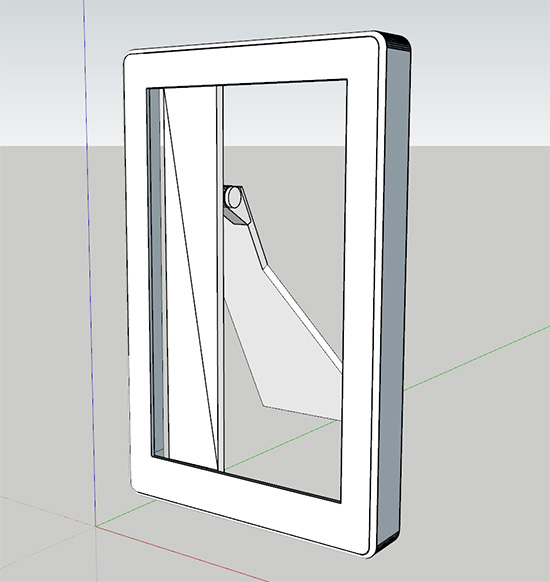
The design is made of 11 parts which will hopefully slot into each other. Also, despite no knowledge of what I’m doing, I am 3D printing a hinge!
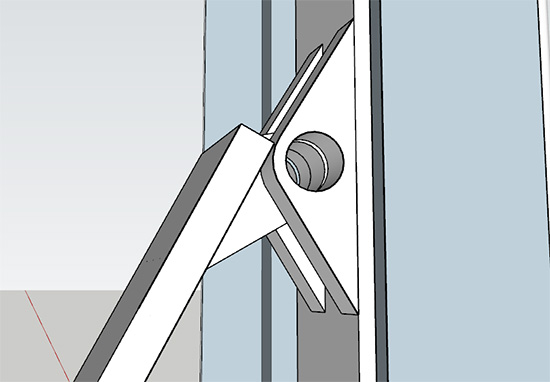
I’m having a little rod with a cap printed too which will slot into this but, as that’s the part I’m least confident about, it will also take an M6 bolt. Rather than attempting to design something stiff, I’ve opted for loose and flappy and have designed holes on the kickstand and main body of the frame that a string will connect between. This will keep the frame upright.
The number of parts grew and grew as I realised how most of the objects I originally designed could not be printed. The main body is now in two pieces as it requires holes and cut-outs on the back but also has a tapered front bezel. I’ll be using lovely metal 5mm insert nuts sunk into the model to attach the board with the circuitry. To save re-printing that board, I used the measurements from it. The source of those measurements are my uncalculated and imprecise bodgings on the very first cardboard attempt. This means they are not very neat.
I’m using 3DPRINTUK again and have opted for their dyed “Carbon black” PA2200 nylon. I’ve also asked them to polish it. I think this will look wonderful against the light-grey and black colours of the e-ink screen.